
Key facts
- Brand
- Panasonic
- Model
- BL-C210
- Category
- Monitoring Equipment
- Industry
- Electronics
- Documents
- 3
- Languages
- EN · ZH
- Last added
- 2012-05-03
Start here
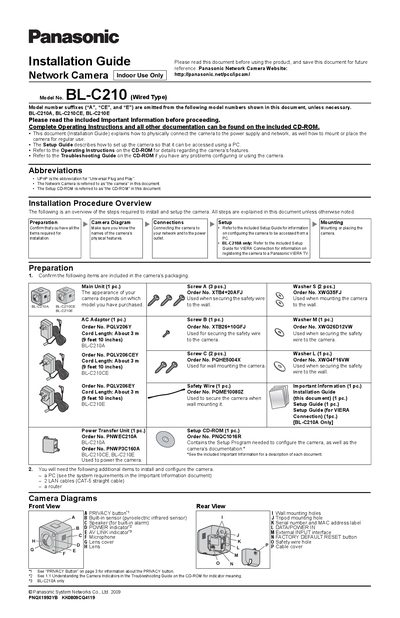
Panasonic BL-C210 Network Camera Installation Guide
The guide provides step‑by‑step instructions for preparing the camera package, connecting the LAN cable and power‑transfer unit, and verifying power indicators. It also references the Setup Guide on the included CD‑ROM for configuring network access and optional VIERA TV connection.
Mounting instructions cover wall and tripod installation, required screws, washers, and safety wire, as well as recommended pull‑out strength and indoor‑only placement. Additional notes describe the built‑in pyroelectric infrared sensor, privacy button operation, and environmental considerations for optimal performance.
Panasonic BL-C210 specifications
| Detection range (front) | about 5 m (16 ft 5 in) |
|---|---|
| Horizontal field of view | about 28° |
| Vertical field of view | about 71° |
| Maximum LAN cable length | 30 m (98 ft 5 in) |
| Power adaptor cord length | about 3 m (9 ft 10 in) |
| Indoor use | Indoor Use Only |
All Panasonic BL-C210 documents by type
Mounting, wiring and first power-up. Read it before the hardware goes in.
Questions answered in these manuals
How do I start the Setup Program?
Insert the included CD‑ROM into your PC; the Setup Program starts automatically, or you can double‑click Setup.exe on the CD.
From: Panasonic BL-C210 / BL-C230 Network Camera Installation Guide
How do I set up wireless settings for the BL‑C230?
After selecting the BL‑C230, click Next, enter the wireless settings, and click Save. If you are not using wireless, select Disable and click Next.
From: Panasonic BL-C210 / BL-C230 Network Camera Installation Guide
How can I configure wireless settings for the BL‑C230?
Select the camera, click "Network Settings", choose "Wireless", enter the wireless password, and click "Save".
How do I set the camera’s date and time?
Open the Settings tab, select "Date & Time", adjust the values, and click "Save".