
Key facts
- Brand
- Panasonic
- Model
- WV-CW474AFE
- Documents
- 2
- Languages
- EN
- Last added
- 2012-03-13
Start here
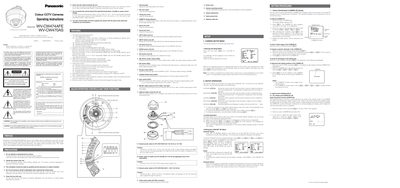
Panasonic WV-CW474AFE / WV-CW470AS User Manual
This manual covers safety precautions, wiring instructions, and power requirements for the Panasonic WV-CW474AFE and WV-CW470AS colour CCTV cameras. It explains how to connect the mains lead, the colour coding of wires, and the required power supplies for each model.
The document also describes the on‑screen setup menu, including camera ID configuration, Auto Light Control (ALC) with SUPER‑D2, shutter speed, gain control, digital noise reduction, and synchronization settings. Detailed step‑by‑step procedures guide users through adjusting illumination, white balance, and other image parameters.
Panasonic WV-CW474AFE specifications
| Minimum illumination (Colour mode) | 2.0 lx (0.20 footcandle) |
|---|---|
| Minimum illumination (Black‑and‑white mode) | 0.2 lx (0.02 footcandle) |
| Horizontal resolution (Colour normal mode) | 480 lines |
| Horizontal resolution (Colour high resolution mode) | 510 lines |
| Horizontal resolution (Black‑and‑white mode) | 570 lines |
| Power input (WV-CW474AFE) | 24 V AC 50 Hz or 12 V DC |
| Operating temperature range | -10 °C to +50 °C |
| Maximum humidity | below 90 % |
| Dynamic range | 48 dB (Typ) |
| Signal‑to‑noise ratio | 50 dB |
All Panasonic WV-CW474AFE documents by type
Day-to-day operation, settings and troubleshooting. Start here if the product is already set up.
Questions answered in these manuals
How can I change the camera ID?
Open the setup menu, move the cursor to CAMERA ID, press the Set button, and use the left/right buttons to edit characters. Press Set again to confirm.
How do I reset all settings to factory defaults?
While the setup menu is not displayed, press both left and right buttons simultaneously and hold the Set button for a few seconds; the "All Reset" message appears and all parameters return to factory defaults.
How can I change the Camera ID on the camera?
Open the CAM SET UP menu, select CAMERA ID, press [E](S) to edit characters, then confirm with the appropriate button.
How do I enable the Auto Light Control (ALC) with SUPER‑D2 function?
In the CAM SET UP menu, move to ALC, select SUPER‑D2, and turn it ON.