
Key facts
Start here
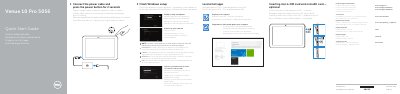
Dell Venue 5056 Quick Start Guide
This guide helps you power on and set up your Dell Venue 5056 tablet. Connect the power cable, press the power button, and follow prompts to complete Windows setup. Connect to your network by selecting your Wi-Fi network and entering the password if required. Sign in to your Microsoft account or create a local account. Locate Dell apps and use SupportAssist to check and update your computer.
The tablet features a front and rear camera, USB 3.0 ports, micro-HDMI, and optional micro-SIM and microSD slots. It includes NFC, a Noble security cable slot, and service tag for support. Use the volume buttons, Windows button, and status lights to manage device functions.
Dell Venue 5056 specifications
| Power button | Press for 2 seconds to turn on |
|---|---|
| Power and battery-charge status light | Indicates power and charging state |
| Microphones | Right and left microphones |
| Headset port | 3.5 mm audio jack |
| Volume-control buttons | Two buttons |
| Micro-HDMI port | Video output |
| USB 3.0 port | Standard USB 3.0 |
| USB 3.0 and power-adapter port (USB-C) | USB-C for data and charging |
| Keyboard-docking slots | Two slots for keyboard attachment |
| Service Tag label | Identification label |
| NFC-sensor area | Optional NFC sensor |
| Noble security-cable slot | Kensington-style lock slot |
| Micro-SIM card slot | For mobile broadband |
| MicroSD-card slot | Storage expansion |
| Windows button | Hardware Windows key |
| Camera-status light | Indicates camera activity |
All Dell Venue 5056 documents by type
The shortest path to a working setup, usually only a few pages.
Questions answered in these manuals
How do I power on the Dell Venue 5056?
Connect the power cable and press the power button for 2 seconds.
How do I connect to a wireless network?
In the charms sidebar, tap Settings, tap the wireless icon, select your network, and tap Connect.
How do I turn on the Dell Venue 5056?
Connect the power cable and press the power button for 2 seconds.
How do I create a recovery drive?
In Windows search, type Recovery, click Create a recovery drive, and follow the on-screen instructions.