
Operating instructions for the Phoenix Contact SF-Z0054 4‑arbor crimping pliers with digital display, covering setup, calibration, wear monitoring and…
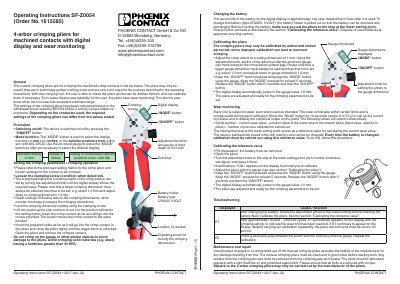
The SF-Z0054 is a 4‑arbor crimping plier equipped with a digital display and wear‑monitoring function. It is intended for crimping machined contacts and provides selectable display units (mm or inches) and eight selector positions in accordance with MIL‑22520.
The manual explains how to switch the tool on and off, set crimping dimensions, change the CR2025 battery, calibrate the tool, interpret wear‑monitoring data and perform routine maintenance. Troubleshooting guidance is provided for error codes E1 and E2, and all repairs must be performed by authorized personnel.
| Battery type | CR2025 3 V |
|---|---|
| Display resolution | 0.01 mm |
| Number of crimp arbors | 4 |
| Battery service life | approximately 1 year |
Pull out the battery holder, remove the CR2025 cell, insert a new CR2025 battery, and ensure the pliers are set to the lower stop before reinserting the holder.
Remove the battery, open the pliers, turn the adjustment knob to the lower stop, insert the battery (display shows “CAL”), adjust with the gauge, hold ON/OFF and press MODE for at least 5 seconds, then release; the display will jump to the gauge value and the tool is calibrated.
E1 appears when the wear limit has been reached; if it persists after calibration, the pliers are worn and must be sent in for service.
Press the "ON/OFF" button to switch the device on or off.