
Quick Start Guide for Dell Latitude 5175/5179 laptop.
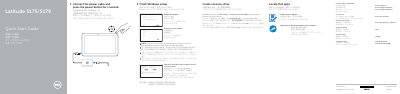
This two-page quick start guide from Dell covers the first steps for the Latitude 5175/5179 computer. It shows how to register the computer, connect the power cable and press the power button for one second, finish Windows setup, enable Dell updates, connect to a network, sign in with a Microsoft account or create a local account, locate Dell apps, and create a recovery drive.
The guide also lists support and contact links (Dell.com/support, Dell.com/support/manuals, Dell.com/support/windows, Dell.com/contactdell), regulatory and safety information, and a numbered features diagram identifying ports, cameras, microphones, card slots, docking connectors and model-specific items such as the NFC sensor area on the Latitude 5175 and the fingerprint reader and smart-card reader on the Latitude 5179. This manual is written in Chinese.
| Micro-HDMI port | 1 |
|---|---|
| USB 3.0 port | 1 |
| USB 3.0 and power-adapter port (USB-C) | 1 |
| NFC-sensor area | Latitude 5175 only |
| Fingerprint reader | Latitude 5179 only |
| Smart-card reader | Latitude 5179 only |
| Micro-SIM card slot | 1 |
| MicroSD-card slot | 1 |
| Docking pins | 2 |
| Docking slots | 2 |
Connect the power cable and press the power button for one second.
Dell lists Dell.com/support, Dell.com/support/manuals and Dell.com/support/windows as the support and manual links.
In Windows search, type Recovery, click Create a recovery drive, and follow the instructions on the screen.
In the system tray, tap the wireless icon, select your network, and tap Connect.