
The document provides installation instructions and precautions for the LNS-2V Lens Assembly Kit, including preparing the pool wall, installing the lens housing, installing the fiber optic cable, and installing the faceplate.
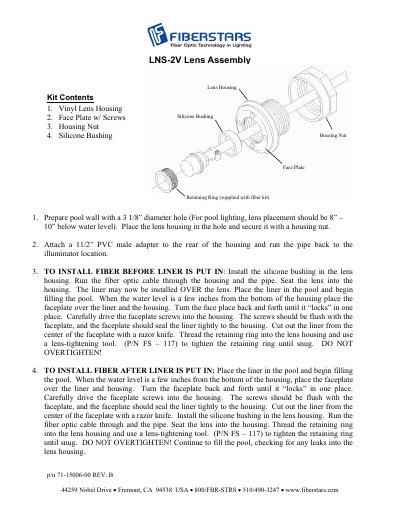
This document provides installation instructions for the FiberStars LNS-2V Lens Assembly, a component for fiber optic lighting systems. The kit includes a vinyl lens housing, face plate with screws, silicone bushing, housing nut, and a retaining ring. It is designed to be installed in a pool wall with a 3 1/8" diameter hole, positioned 8" to 10" below the water level.
| Hole Diameter | 3 1/8" |
|---|---|
| Lens Placement Depth | 8" — 10" below water level |
| Adapter Size | 1 1/2" PVC male adapter |
| Tightening Tool Part Number | FS — 117 |
The silicone bushing should be installed in the lens housing before running the fiber optic cable through it.
Turn the faceplate back and forth until it locks in one place, then drive the screws in until they are flush with the faceplate.
Do not overtighten the retaining ring when using the lens-tightening tool.