
This quick reference guide introduces how to record and playback VHS, S-VHS, and mini-DV tapes using the JVC HR-DVS3U VCR.
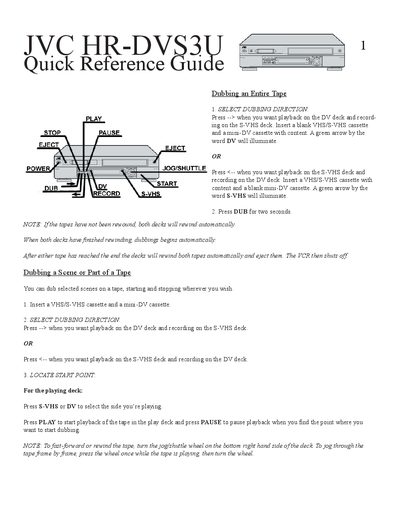
The guide explains how to dub an entire tape or selected scenes, showing the required dubbing direction, playback and record deck selections, and automatic rewinding. It also details how to import video from Mini‑DV or VHS/S‑VHS tapes into popular editing programs such as iMovie, Final Cut Pro, Premiere, and VideoStudio.
Additional sections describe using the deck as a media converter by connecting external studio equipment to the front or rear input jacks, exporting video to DV or VHS/S‑VHS tapes, and performing a live show without a computer. Controls such as the jog/shuttle wheel, channel selector, and menu options are also covered.
Select the dubbing direction, then press DUB for two seconds; the decks will automatically rewind and start dubbing.
Insert the VHS or S‑VHS tape, open your editing program, set the device control to None, select S‑VHS, set the dubbing direction, and capture the footage.
Make sure the channel is set to F‑1, select DV, press TOP PAUSE, and use your editing program’s export function to send the video to tape.