
This document provides assembly instructions and installation requirements for the Ergotron LX Keyboard Arm, Wall Mount. The product is designed for wall mounting and it is important to ensure that the wall structure can support four times the total weight of the mounted equipment. The document includes a list of materials and tools required for installation, as well as detailed step-by-step instructions.
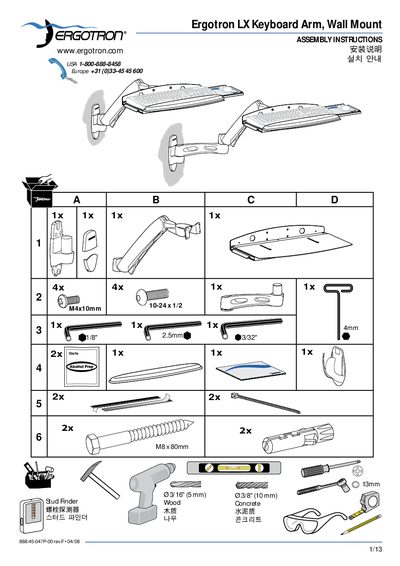
This guide provides detailed assembly and mounting instructions for the Ergotron LX Keyboard Arm wall‑mount. It includes safety warnings, recommended fasteners, and tips for mounting on wood, concrete, or pole clamps.
The document also contains the Ergotron warranty policy, outlining a five‑year warranty on most products and specific warranty periods for Neo‑Flex, power‑supply components, and refurbished items.
| Mounting screw size (standard) | 10‑24 x 1/2" |
|---|---|
| Mounting screw size (pole clamps) | 10‑24 x 5/8" |
| Minimum concrete hole depth | 3‑1/8" (80 mm) |
It can be mounted to wood, concrete, or pole clamps, provided the wall structure can support four times the total weight of the mounted equipment.
Ergotron provides a five‑year warranty on most products, with specific periods for Neo‑Flex (3 years), power‑supply components (2 years), and refurbished items (90 days).