
MOOG DYK14-102 Hub Assemblies Installation Instructions

Installation and removal guide for MOOG hub assemblies, including torque specs and tool requirements.

MOOG DYK14-102 Hub Assemblies Installation Instructions - cover page
Brand
MOOG
Category
Vehicle maintenance
Document type
Installation Guide
Language
English
Pages
1
File format
PDF
File size
358 KB
Published
01 November, 2026
Updated
01 November, 2026
MD5 checksum
1123A42DA6B3AD11344FC3E0A70A7972

About this manual

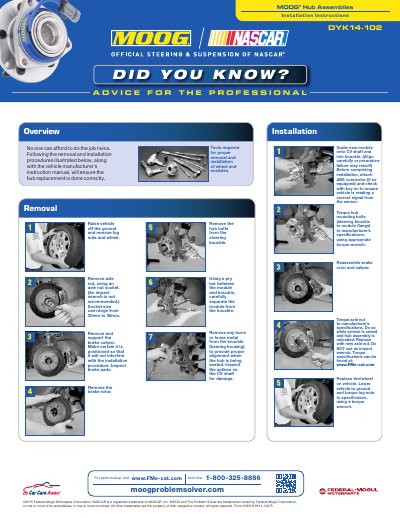
This guide provides step-by-step instructions for installing and removing MOOG hub assemblies. It covers aligning the module, attaching the ABS connector, torquing bolts, and reassembling brake components. Proper tools and torque specifications are critical to avoid premature failure.

The document also includes removal steps, such as removing the brake rotor, hub bolts, and axle nut, and inspecting components for damage or burrs before installation.

What's inside

  • Installation
  • Removal
  • Torque Specifications
  • Tools Required
  • ABS Connector
  • Brake Rotor and Caliper
  • CV Shaft Alignment
  • Inspection

Frequently asked questions

What must be done before completing the installation of the hub assembly?

Attach ABS connector (if so equipped) and check with key on to ensure vehicle is reading a correct signal from the sensor.

What tool is not recommended for tightening the axle nut?

Do NOT use an impact wrench.

What is the recommended torque method for hub mounting bolts?

Torque hub mounting bolts to manufacturer’s specifications, using appropriate torque wrench.

Where can torque specifications be found?

Torque specifications can be found at: www.FMe-cat.com

Download PDF (358 KB)

More MOOG Manuals


View all MOOG manuals →