
The Dell OptiPlex 7440 All-in-One Quick Start Guide provides instructions on how to connect the power cable and other devices, install the cable cover, remove the torx screw from the cable cover, install the stand, press the power button, finish Windows 10 setup, enable support and protection, connect to your network, and sign in to your Microsoft account or create a local account.
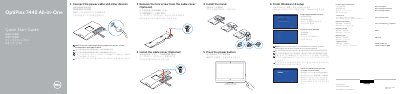
This two-page Dell OptiPlex 7440 All-in-One Quick Start Guide covers connecting the power cable and other devices, removing the torx screw from the optional cable cover, installing the cable cover and stand, pressing the power button, and finishing Windows 10 setup. It also covers network connection, Microsoft account sign-in or local account creation, and finding Dell apps.
The guide lists features and connectors including microphone, camera, camera privacy latch, optical drive, OSD buttons, status lights, DisplayPort, HDMI-out, HDMI-in, USB 3.0, USB 2.0, network, headset, and memory card reader. It provides Dell support and regulatory links and identifies the computer model as OptiPlex 7440 AIO.
| Computer model | OptiPlex 7440 AIO |
|---|---|
| Optical drive | Yes |
| DisplayPort connector | Yes |
| HDMI-out connector | Yes |
| USB 3.0 connectors | Yes |
| HDMI-in connector | Yes |
| USB 2.0 connectors | Yes |
| Network connector | Yes |
| Memory card reader | Yes |
See the documentation that shipped with the wireless keyboard or mouse.
Enter the password for the wireless network access when prompted.
See the Owner’s Manual at dell.com/support.
The computer model is OptiPlex 7440 AIO.