
Instruction manual for Fiberstars Lighted Spillway Pots
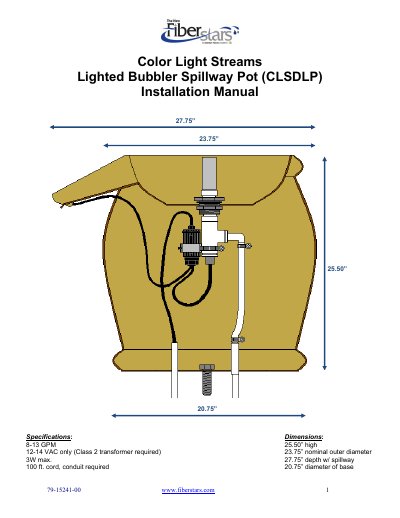
This manual provides step-by-step instructions for installing the Fiberstars Lighted Bubbler Spillway Pot. It covers water supply connections, conduit placement, electrical wiring using a 12VAC low-voltage cord, and positioning the pot near the water’s edge. It also includes detailed winterization procedures for soft and hard freeze conditions, including draining, blowing out lines, and securing the unit to prevent damage from wind or freezing temperatures.
The pot requires a Class 2 transformer, 8–13 GPM water flow, and must be mounted within 1–2 inches of the deck’s edge. Optional hold-down slots and lag bolts are provided for secure installation, and the pot must be winterized properly to avoid damage.
| Water Flow Rate | 8-13 GPM |
|---|---|
| Voltage Requirement | 12-14 VAC only (Class 2 transformer required) |
| Cord Length | 100 ft. |
| Dimensions | 25.50” high, 23.75” nominal outer diameter, 27.75” depth w/ spillway, 20.75” base diameter |
12–14 VAC only, requiring a Class 2 transformer.
The pot’s base should be 1”–2” from the deck edge, with the spillway lip over the water’s edge and square to it.
1” pipe is recommended; ¾” pipe requires a ¾” to 1” reducer.