
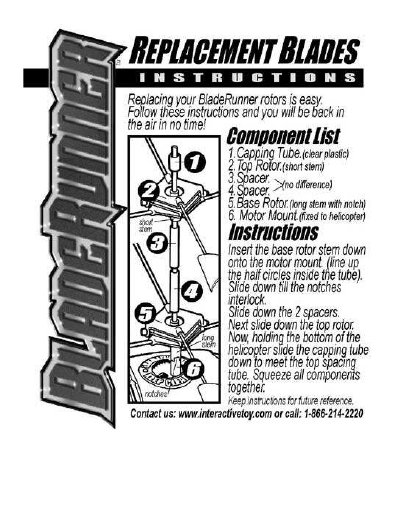
This document provides step-by-step instructions for replacing the rotor components of a BladeRunner toy helicopter. The process involves assembling the base rotor onto the motor mount, adding spacers, installing the top rotor, and finally securing the assembly with the capping tube.
The required components listed are a clear plastic Capping Tube, a Top Rotor with a short stem, a Base Rotor with a long stem and notch, and a Motor Mount fixed to the helicopter.
First, insert the base rotor stem onto the motor mount, then slide down the two spacers, followed by the top rotor, and finally the capping tube.
You must align the half circles inside the tube and slide down until the notches interlock.
Hold the bottom of the helicopter and squeeze all components together after sliding the capping tube down to meet the top spacer.