
The IDEAL Pow‑R‑Master II pneumatic wire stripper instruction manual provides operating steps, safety warnings, and service procedures.
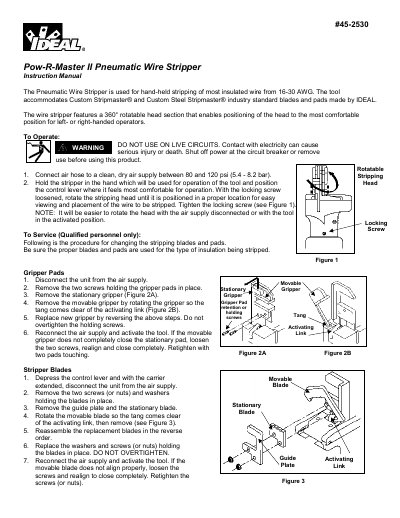
The Pow‑R‑Master II pneumatic wire stripper is a hand‑held tool for stripping insulated wire from 16‑30 AWG. It features a 360° rotatable head and accepts IDEAL Custom Stripmaster® and Custom Steel Stripmaster® blades and pads. The manual outlines safety precautions, including the prohibition of use on live circuits, and details the required air supply of 80‑120 psi.
Operating instructions cover connecting the air hose, positioning the head, and adjusting the flow control valve for desired strip speed. Service sections describe blade and pad replacement, carrier brake adjustment, lubrication every 10,000 cycles, and mounting a wire stop. Warranty information and contact details for IDEAL Industries are also provided.
| Air supply pressure | 80‑120 psi (5.4‑8.2 bar) |
|---|---|
| Supported wire size | 16‑30 AWG |
| Head rotation | 360° rotatable |
| Lubrication interval | once every 10,000 cycles |
| Warranty period | 12 months |
The tool requires a clean, dry air supply between 80 and 120 psi (5.4‑8.2 bar).
Lubricate the carrier tracks sparingly once every 10,000 cycles.
No. The manual explicitly warns not to use the tool on live circuits.
Remove the two screws, take out the springs and worn brakes, install new brakes and springs, then tighten the screws until the screw cap is flush with the top of the carrier.