
OptiPlex 3050 Micro Desktop Quick Start Guide
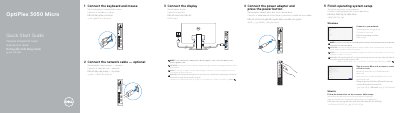
This Dell quick start guide for the OptiPlex 3050 Micro desktop walks through the first-time setup in five numbered steps: connecting the keyboard and mouse, connecting the network cable (optional), connecting the display, connecting the power adapter and pressing the power button, and finishing operating system setup. A note explains that if the computer was ordered with a discrete graphics card, the display should be connected to that card. The OS setup step covers connecting to a network — including entering a password when a secured wireless network is used — and signing in to a Microsoft account or creating a local account, followed by the on-screen instructions.
The second page shows where to find Dell apps such as SupportAssist, which checks and updates the computer, and gives a numbered feature tour of the system: power button and power light, hard drive activity light, headset and line-out ports, USB 3.0 ports, an optional VGA, Serial, PS/2 or DisplayPort connector, Kensington security cable slot, padlock ring, cable holder, DisplayPort, HDMI port, power connector port, network port and USB 2.0 ports. Support and regulatory links are listed, along with the regulatory model D10U, regulatory type D10U002 and computer model OptiPlex 3050 Micro. The same instructions are repeated in Indonesian, Spanish, Vietnamese and Arabic; the document is dated 2016-12 and printed in China.
| USB 3.0 ports | Shown as callout items 5 and 16 |
|---|---|
| USB 2.0 port (supports Smart Power On) | Shown as callout item 14 |
| USB 2.0 port | Shown as callout item 15 |
| HDMI port | Shown as callout item 11 |
| DisplayPort | Shown as callout item 10 |
| Network port | Shown as callout item 13 |
| Kensington security cable slot | Shown as callout item 7 |
| Regulatory model / type | D10U / D10U002 |
Connect the display to the computer, but if the computer was ordered with a discrete graphics card, connect the display to that card instead.
Connect to your network, sign in to your Microsoft account or create a local account, then follow the instructions on the screen.
Enter the password for the wireless network access when prompted.
Dell lists Dell.com/support for product support and Dell.com/support/manuals for manuals.