
The document provides safety precautions and installation/repair procedures for a heater. The heater poses risks of fire, explosion, and electrical shock, and should be serviced by qualified professionals. It is advised to allow the heater to cool before touching certain parts. Checking for leaks in the flue and vent pipe joints is important to prevent carbon monoxide hazards. Retrofitting the heater requires the appropriate Appliance Adapter Kit. The document outlines steps to turn off power, remove jackets, disconnect wires, and remove the vent pipe and vent body.
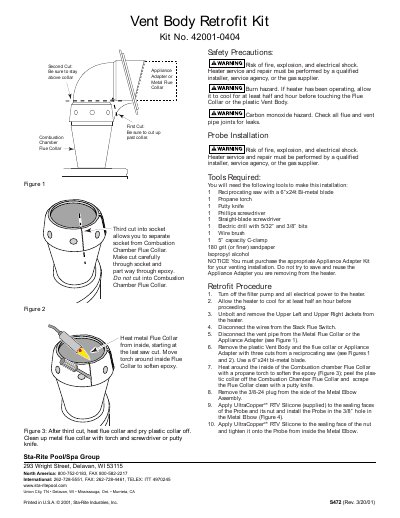
This document provides step-by-step instructions for installing the Sta-Rite 42001-0404 Vent Body Retrofit Kit. It includes safety precautions, a list of required tools, and a detailed retrofit procedure involving the removal of the old vent body and the installation of a new welded vent elbow assembly using RTV silicone.
| Working time after RTV joint | about 1/2 hour |
|---|---|
| Cure time before testing | one hour |
| Wait time before continuous firing | 24 hours |
You need a reciprocating saw with a 6”x24t Bi-metal blade, a propane torch, putty knife, screwdrivers, a drill with 5/32” and 3/8” bits, a wire brush, a C-clamp, sandpaper, and isopropyl alcohol.
The heater must be allowed to cool for at least half an hour before touching the Flue Collar or the plastic Vent Body.