
DELL 2200MP Projector User Guide, introduces the projector's safety instructions and usage methods
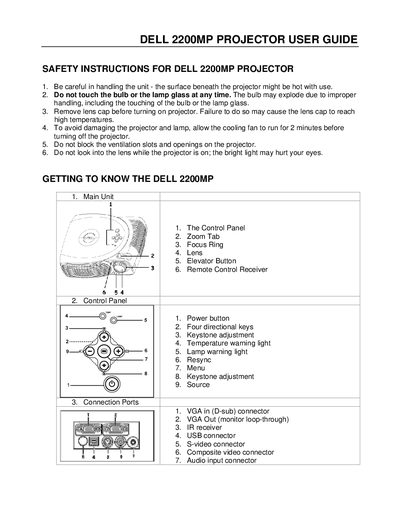
This guide covers safety precautions, hardware overview, and remote‑control functions for the Dell 2200MP micro‑projector. It explains how to connect power, VGA, USB and other cables, remove the lens cap, and power on the unit.
The manual details on‑screen display navigation, image adjustments such as keystone correction, aspect‑ratio selection, brightness and contrast, as well as management settings for projection mode and menu location. A troubleshooting section addresses common issues like no image, blurry focus, flickering, and lamp problems.
| Projection distance | 3.9 ft to 39.4 ft |
|---|---|
| Supported aspect ratios | 4:3, 16:9, 16:9U, 1:1 |
| Maximum resolution for 1:1 mode | SVGA (800 × 600) |
| Video mode options | PC, Movie, sRGB, User |
Make sure the lens cap is removed, the projector is turned on, the graphics port is enabled, and all cables are securely connected.
The projector auto‑detects a 16:9 DVD, but you can select a 4:3 aspect ratio on the DVD player or in the OSD’s All Images menu to avoid stretching.
Turn the focus ring on the projector lens until the image is sharp, and ensure the screen is within the required distance.
Open the Management menu in the OSD and select the desired projection mode such as Front Projection‑Ceiling Mount or Rear Projection‑Ceiling Mount.