
Apple Mac Pro Mid 2010 Solid State Drive Replacement Instructions

This document contains the instructions on how to replace the solid-state drive in Mac Pro
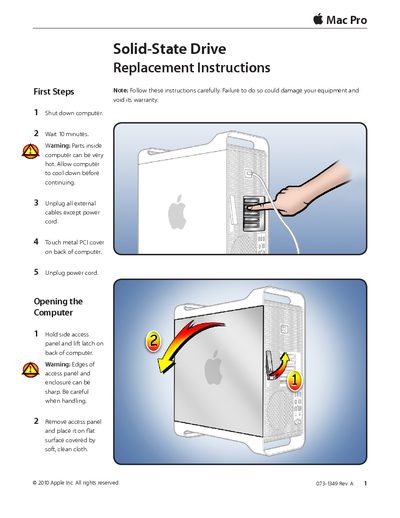

Apple Mac Pro Mid 2010 Solid State Drive Replacement Instructions - cover page
Brand
Apple
Category
Desktops
Document type
Service Manual
Language
English
Pages
7
File format
PDF
File size
899 KB
Published
05 June, 2012
Updated
30 September, 2023
MD5 checksum
1F9CD51C71ADF3A7C089B58448594025

About this manual

This document provides step-by-step instructions for replacing a solid-state drive in an Apple Mac Pro (Mid 2010). It covers safety precautions such as allowing the computer to cool down and disconnecting power before opening the chassis. The guide details how to remove the access panel, extract the existing drive carrier, swap the drive within its adapter, and reassemble the unit.

What's inside

  • First Steps
  • Opening the Computer
  • Required Tool
  • Removing the Installed Drive
  • Installing the Replacement Drive
  • Closing the Computer
  • Formatting a New Drive
  • Reinstalling Software
  • Erasing the Hard Drive
  • Completing Setup Assistant

Specifications

Document RevisionRev. A
Copyright Year2010

Frequently asked questions

How long must the computer cool down before opening?

You must wait 10 minutes after shutting down to allow parts inside the computer to cool.

What tool is required for this replacement?

A Phillips #1 screwdriver is needed to remove the screws on the side of the carrier adapter.

Download PDF (899 KB)

More Apple Manuals


View all Apple manuals →