
Step-by-step instructions for installing the Cognex In-Sight Autofocus Accessory Vision System, including component placement, screw torque specifications…
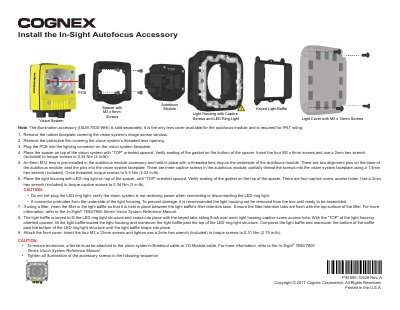
This guide provides step-by-step instructions for installing the In-Sight Autofocus Accessory Vision System. The process involves removing the rubber faceplate and protective film, then installing the PCB, spacer, autofocus module, light housing with LED ring light, and light baffle. Specific torque values are provided for all screws to ensure proper assembly.
| Spacer screw torque | 0.34 Nm (3 in-lb) |
|---|---|
| Autofocus module screw torque | 0.5 Nm (4.43 in-lb) |
| Light housing captive screw torque | 0.34 Nm (3 in-lb) |
| Front cover screw torque | 0.31 Nm (2.75 in-lb) |
Tighten all illumination accessory screws in the sequence 1, 2, 3, 4.
No, the illumination accessory (ISLM-7000-WHI) is sold separately.
Do not hot-plug the LED ring light; verify the vision system is not receiving power.