
This document is the user manual for a notebook computer of a certain brand and model. It mainly introduces the features of the notebook computer, such as screen size, processor model, and memory capacity.
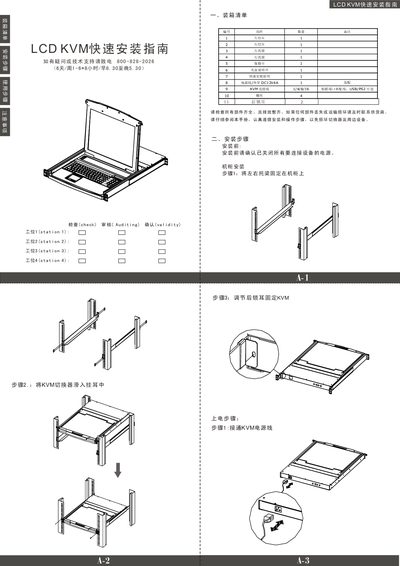
This guide walks you through the preparation, connection, and adjustment steps needed to install the LCD KVM switch safely. It lists all required parts, shows how to attach the mounting ears, connect power and KVM cables, and adjust the rear lock ears.
After installation, the guide explains how to use the on‑screen display (OSD) menu to switch between connected servers or PCs, and provides safety warnings such as keeping the device away from water, ensuring proper ventilation, and verifying the power input range. This manual is written in Chinese.
| Power Supply | DC 12 V 4 A |
|---|---|
| KVM Connection Cable | 174/8/16 (USB/APS2 optional) |
Confirm that all devices to be connected are powered off before beginning the installation.