
This manual introduces the quick installation method of the GIGABYTE liquid cooling system, including the installation of water block, radiator, water tank, pump and fan speed controller, and provides the steps for injecting water cooling liquid.
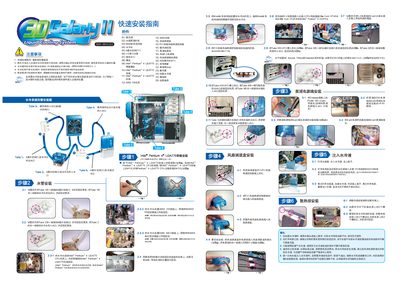
This guide provides the complete installation procedure for Gigabyte's water‑cooling system, including required accessories, tube routing, and connection of power cables. It also outlines the precautions to take before and after filling the coolant.
The document details how to secure tubes with clamps, attach the cooling head to various CPU sockets, connect the pump and fan power lines, and verify the water‑level indicator. It finishes with instructions for filling the coolant, testing the system, and handling low‑water warnings. This manual is written in Chinese.
| Low water level indicator | Red LED on PCB flashes |
|---|---|
| Automatic shutdown on low water | System shuts down within 4 seconds |
| Pump power connector | 2‑pin Power SW to pump power line |
| Recommended coolant | Gigabyte branded coolant only |
When the water level falls below the low‑water line, the red LED on the PCB flashes.
The system automatically shuts down within four seconds after detecting insufficient water.
Only Gigabyte‑branded coolant should be used; other coolants are not covered by warranty.
Connect the 2‑pin Power SW (mother) to the pump power line (male), then link the pump’s SW power to the motherboard +PW jumper.