
This document is about the manual tab-tension 2 series manual pull-down projector screen user guide of elitescreens. It mainly introduces the features and characteristics of the screen and the installation instructions.
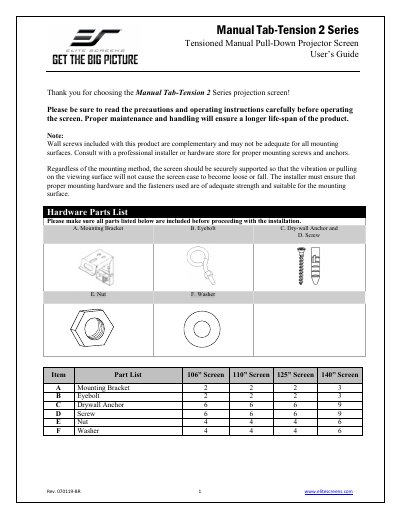
This user guide provides step-by-step instructions for installing the Manual Tab-Tension 2 Series projector screen on flush walls, ceilings, or suspended ceilings. It includes hardware parts lists for different screen sizes (106" to 140").
The guide also explains how to operate the screen, including pulling it down at a 90-degree angle, using the slow retract mechanism, and adjusting screen tension with a 4mm Allen wrench (though factory settings are recommended). Safety notes warn against damaging the screen material or voiding the warranty through improper handling.
Mark screw locations, drill holes, insert drywall anchors, mount the bracket with screws, then attach the screen to the bracket.
Pull the screen down more than 2 inches, then release it gently to retract. The screen has a slow retract mechanism that allows it to retract without holding the handle.
Yes, using a 4mm Allen wrench, turn the adjustment knob clockwise to increase tension or counter-clockwise to decrease it. However, factory settings are recommended to avoid damaging the screen or voiding the warranty.