
This document is the installation instructions for a product produced by Spinner GmbH in Germany. It mainly introduces the installation method of the product and provides instructions on the precautions during the installation process.
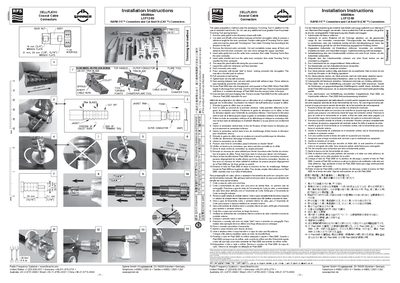
The guide explains how to prepare the coaxial cable using a knife, a fine‑toothed hacksaw and the special Trimming Tool. It describes removing the outer jacket, cutting the cable to the reference length, and trimming both the outer and inner conductors while preserving the copper‑clad finish.
After the cable is prepared, the connector is inserted, pressed until a double "click" is heard, the back nut is tightened with a wrench, and the assembly is sealed with adhesive tape and a Plast 2000 silicone tube to ensure a reliable, waterproof connection.
| Outer conductor flange size | 19 mm (3/4) |
|---|---|
| Wrench flats for back nut | 7‑16 |
| Interface dimensions | 21 mm, 24 mm (7/8\", 15/167) |
| Cable preparation tool | Trimming Tool with preset spring tension |
Cut the cable jacket with a knife to the dimension shown in the guide.
Use the Trimming Tool; do not apply force greater than its preset spring tension.
Push the connector until a double "click" is heard, indicating it is locked.