
TP-Link EAP wireless access point quick installation guide covering ceiling and wall mounting, PoE power, LED indications, and software setup.
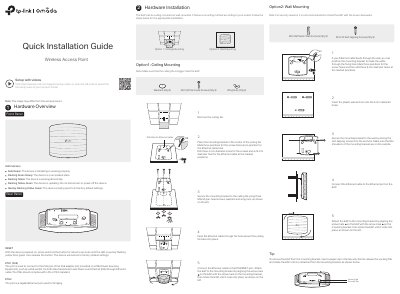
The TP-Link EAP is a wireless access point that can be ceiling-mounted or wall-mounted. This quick installation guide describes the hardware, mounting bracket installation, Ethernet and PoE connections, LED indications, and reset procedure.
It also covers software configuration in Standalone Mode or Controller Mode using a web browser or the TP-Link Omada App, plus power supply options and safety information.
| ETH1 (PoE) port | Connects to a PoE adapter or PSE for data and Power over Ethernet |
|---|---|
| ETH2 port | Gigabit Ethernet port used for bridging |
| Power source | Power adapter or PSE compliant with LPS or PS2 |
| Mounting options | Ceiling mounting or wall mounting |
| Default SSID format | TP-Link_2.4GHz/5GHz_XXXXXX |
With the device powered on, press and hold the RESET button for about 5 seconds until the LED quickly flashes yellow then green, then release it.
Use admin for both the username and password.
The EAP can be powered via a power adapter or a PSE such as a PoE switch that complies with LPS or PS2.
Connect to the default SSID and enter http://tplinkeap.net in a web browser.