
Quick installation guide for the Performance Series Cameras HBW4PER2 MFZ bullet camera: included parts, mounting surface preparation, mounting, aiming and…
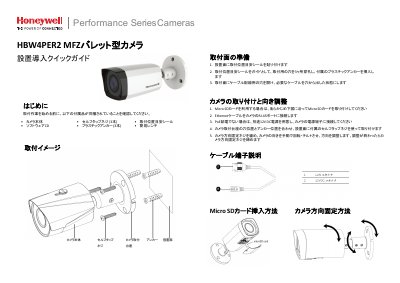
This Japanese quick installation guide describes how to set up the Performance Series Cameras HBW4PER2 MFZ bullet camera. It starts with a check of the supplied items (camera body, software CD, three self-tapping screws, three plastic anchors, a mounting position template sticker and a simple wrench), then explains how to prepare the mounting surface by applying the template, drilling three holes and inserting the anchors.
The guide then covers mounting the camera base with the supplied screws, inserting a Micro SD card if one is used, connecting the Ethernet cable to the RJ-45 port, and using a separate 12V DC power supply when PoE is not available. The last step explains loosening the camera direction fixing screw, rotating and tilting the camera by hand to aim it, and tightening the screw again. This manual is written in Japanese.
| Power supply (non-PoE) | Separate 12V DC power supply connected to the camera power terminal |
|---|---|
| Network connection | Ethernet cable connected to the camera RJ-45 port |
| Storage | Micro SD card supported |
The camera can be powered over PoE; if PoE is not used, a separate 12V DC power supply must be connected to the camera power terminal.
Drill 3 holes for mounting, using the mounting position guide sticker as a guide, and insert the included plastic anchors.
You need to prepare a separate 12V DC power supply and connect it to the camera's power terminal.