
Spanish installation manual for the NeroxDomo Allone Pro WiFi module, covering app setup, pairing, Alexa and Google Home linking, LED status and specs.
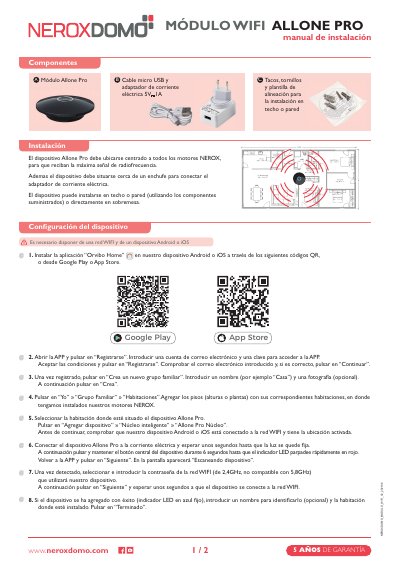
This Spanish installation manual covers the NeroxDomo Allone Pro WiFi module. It explains how to install the Orvibo Home app, register an account, create a family group and rooms, connect the device to a 2.4GHz WiFi network, and pair NEROX motors.
The guide also describes linking with Amazon Alexa and Google Home, LED indicator meanings, troubleshooting, warnings, and device specifications. It states that the Allone Pro should be centered relative to the NEROX motors and placed near a power outlet; it can be installed on a ceiling or wall with the supplied parts or placed directly on a tabletop. This manual is written in Spanish.
| Name | Allone Pro |
|---|---|
| Dimensions | Ø110mm x 31mm |
| Radio standard | WIFI 802.11 b/g/n 2.4GHz |
| Voltage | 5V1A - Micro USB |
| Model | VS20RB-1VO |
| Materials | PC/ABS/Acero niquelado |
| Modulation | OOK/2FSK/2GFSK/GMSK |
| Standby consumption | < 0.5W |
| Radio frequency | 433.92MHz |
| Device weight | 185g |
| Infrared frequency | 20-60KHz |
| Warranty | 5 years |
Se debe instalar la aplicación Orvibo Home en un dispositivo Android o iOS.
El dispositivo usa una red WiFi de 2,4GHz y no es compatible con 5,8GHz.
Hay que mantener pulsado el botón central durante 6 segundos hasta que el LED parpadee rápidamente en rojo.
Se incluyen tacos, tornillos y una plantilla de alineación.