
Installation instructions for Aquatic barrier-free showers with a pre-leveled base, covering alcove prep, drain and valve fitting, clean-up and maintenance.
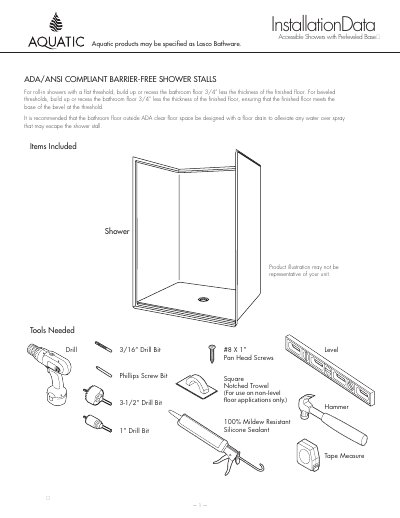
This is the installation document for Aquatic accessible, barrier-free shower stalls supplied with a pre-leveled base. It lists the tools needed and the items included, explains pre-installation planning for the alcove, describes how to build up or recess the bathroom floor for flat and beveled thresholds, and walks through the installation procedure step by step, from spreading foundation material and placing the unit to fastening the nailing flanges, connecting the supply lines and waste pipe, and water testing for drainage.
The document also contains clean-up guidance and user maintenance instructions, including which cleaners and solvents to use or avoid, how to buff out light scratches and restore dull areas, and notes on rubber mats and hard water. It states that the stalls are ADA/ANSI compliant and that Aquatic products may be specified as Lasco Bathware. Contact addresses and phone numbers for Aquatic in Anaheim, CA and Arlington, TX are given on the last page.
| Compliance | ADA/ANSI compliant barrier-free shower stalls |
|---|---|
| Floor build-up or recess | 3/4” less the thickness of the finished floor |
| Required floor slope toward drain | 1/4” per foot |
| Drain box out | 8” x 8” (205mm x 205mm) for 2” (50mm) IPS and drain connection |
| Nailing flange fastener spacing | Every 8 inches, starting from the floor and moving upward |
The document lists 3/16”, 3-1/2” and 1” drill bits, a Phillips screw bit, a level, hammer, tape measure and drill, plus #8 x 1” pan head screws and 100% mildew resistant silicone sealant.
Check for a proper floor slope of 1/4” per foot by placing a level in the locations shown and measuring the slope along its length.
Provide an 8” x 8” (205mm x 205mm) box out for the 2” (50mm) IPS and drain connection.
No. Abrasive cleaners such as scouring powders, pads, steel wool, scrapers or sandpaper should never be used; warm water and liquid detergents or non-abrasive cleansers are recommended instead.