
This document describes the installation and maintenance instructions for rectangular and custom covers.
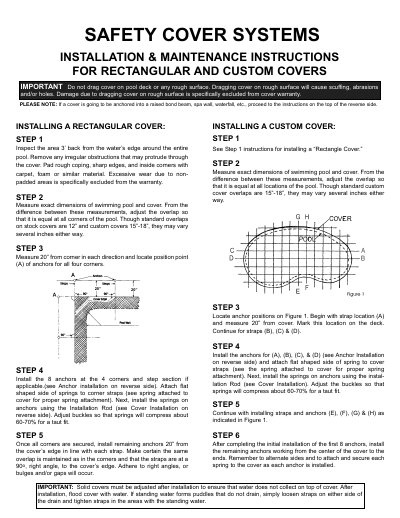
This document provides step-by-step instructions for installing rectangular and custom safety cover systems on swimming pools. It details the process of securing anchors, attaching springs, and ensuring a taut fit to prevent damage and ensure safety.
The guide also covers specialized installation scenarios, including raised bond beams, spa walls, waterfalls, wood decks, and loose brick or stone surfaces. Additionally, it outlines specific care and maintenance procedures to extend the life of the cover and maintain warranty validity.
| Standard overlap for stock covers | 12 inches |
|---|---|
| Standard overlap for custom covers | 15-18 inches |
| Anchor position from corner | 20 inches |
| Spring compression adjustment | 60-70% |
| Recommended water level during snow season | within 18 inches of the top of the pool |
Dragging the cover on rough surfaces causes scuffing, abrasions, and/or holes, which are specifically excluded from the warranty.
Springs should be compressed about 60-70% to ensure a taut fit.
A brass anchor installed using a wing bit and hex key, with the casing sprayed with silicone.
Flood the cover with water; if standing water forms, loosen straps near the drain and tighten straps in areas with standing water.